


Purview auto-labeling simulation gives Microsoft 365 teams a safer way to validate sensitivity labeling policies before enforcement. This article explains how simulation mode works, what results to review, and how to tune policies for more accurate automation.

In almost every Purview project I am a part of, the customer would love to turn on all the service-side Information Protection label automation features that they can, so the users don’t need to be bothered (or trusted) to add sensitivity labels to files and emails themselves.
While I can certainly sympathize, the reality is that a lot of preparation and diligent planning is required to make automatic labeling work predictably, accurately, and without risking business disruption– and you will still have to train your employees on how to use and interact with labels, regardless of how they are applied.
One of the more recent additions to Purview is the ability to run auto-labeling policies in simulation mode so that you can see what labels would be applied without actually changing any data. This is a bit of a game-changer when it comes to being able to predict outcomes and proactively prepare for automatic labeling.
In the past, you had to test automated labeling policies with samples or copies of live data. Now, we have a consequence-free way to test on real, live data to confirm that Sensitive Data Types are tuned and that policies are properly designed prior to automatically labeling any data.
What Auto‑Labeling Simulation Mode Actually Does
Auto‑labeling simulation allows you to run a labeling policy in a non-enforced state, meaning that you will be able to see what the policy would do if it were actually enabled. Microsoft Purview evaluates content using the classifiers and scope you select, but the labels are not actively applied. Instead, Purview provides a reporting and analysis portal that provides visibility to the following:
- What items would be labeled
- Any labels applied currently
- Where those items are located
- Which classifier(s) or condition(s) caused the match
The users don’t see anything change, and no labels are actually changed or applied. Any encryption, watermarks, access controls, etc., that are part of the label configuration do not take effect. The simulation process I will show here is conceptually very similar to the simulation mode in Purview DLP, which has been part of Purview for quite a while.
That said, there are a few key differences that I will highlight in the next steps.

How to Configure and Run an Auto-Labeling Simulation
1. Configure the Auto‑Labeling Policy in Simulation Mode
The setup process mirrors a standard auto‑labeling policy. You need to define:
- The sensitivity label you would like the policy to apply
- The workloads and locations in scope, such as Exchange, SharePoint, and particular mailboxes or sites
- The classifiers or conditions that trigger labeling, such as Sensitive Information Types, creation date, etc.
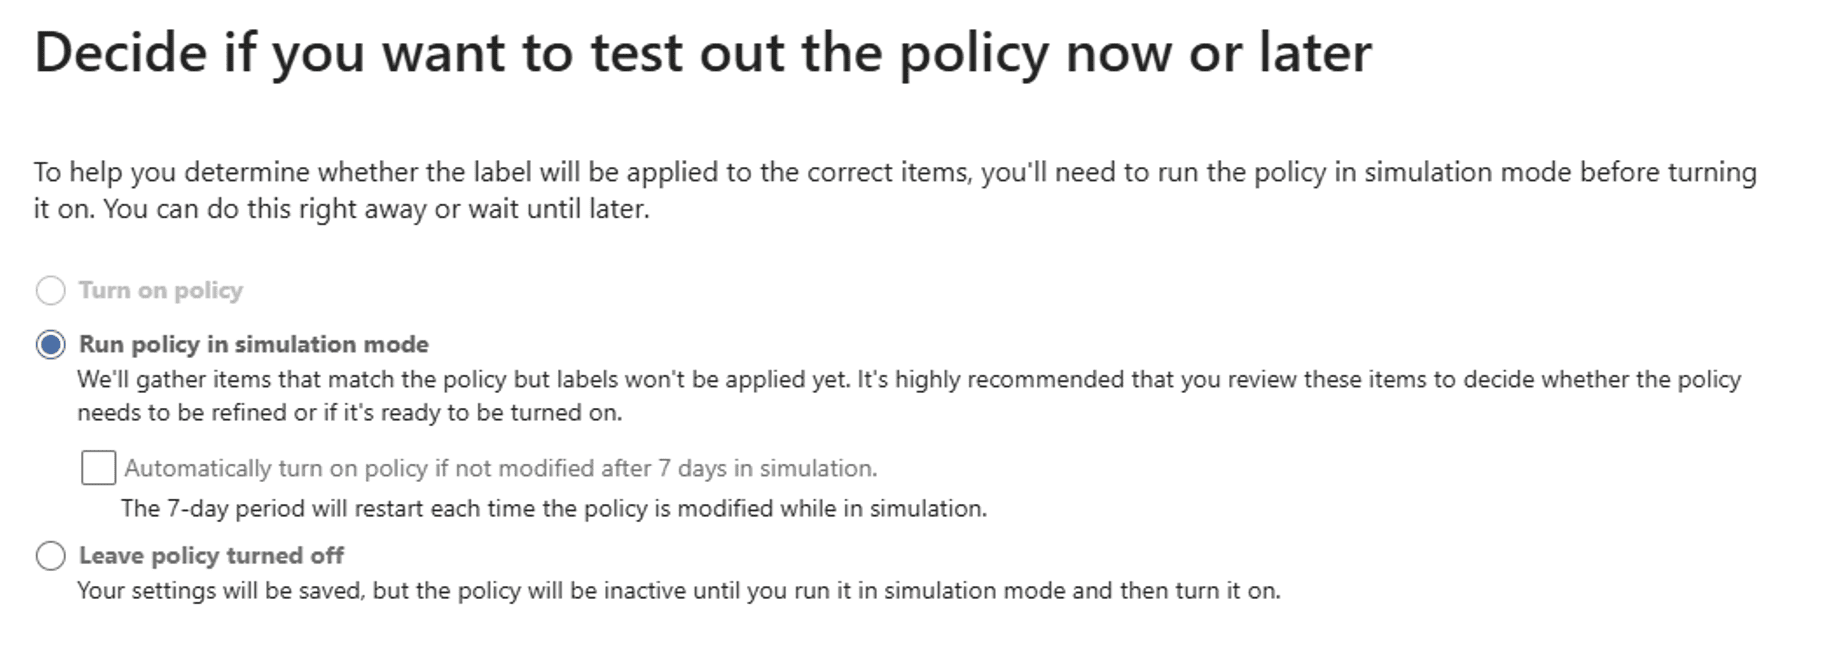
Then, instead of enabling enforcement, the policy is set to Simulation. (You should leave the option to turn the policy on after 7 days set to Disabled while you are running your simulations for the first time.)
2. Let the Simulation Run for at least 7 Days
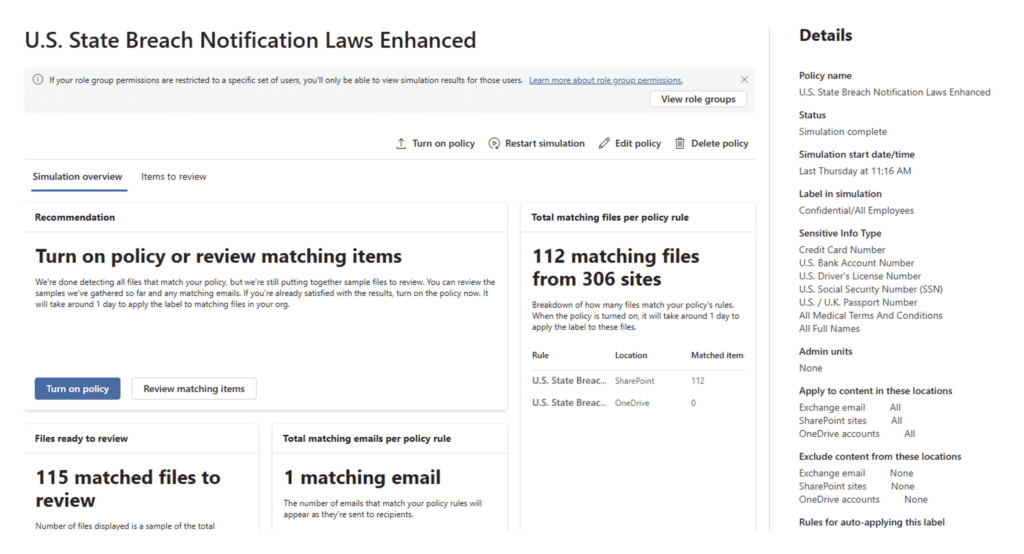
Once enabled, the simulation starts evaluating content across the scoped locations, looking for matches to the SITs or conditions you have set in the policy. This isn’t instantaneous, especially in large tenants. You should start to see results in a few hours. As results accumulate, Purview begins to show:
- Number of Items matched
- Label conditions triggered
- Locations with higher concentrations of matches
Note: Unlike DLP simulation, the labeling simulation is limited to a sampling of about 100 files per site. This is enough to show you if the policy is working as intended, but will not produce an overwhelming amount of data for you to analyze.
3. Review What Would Be Labeled
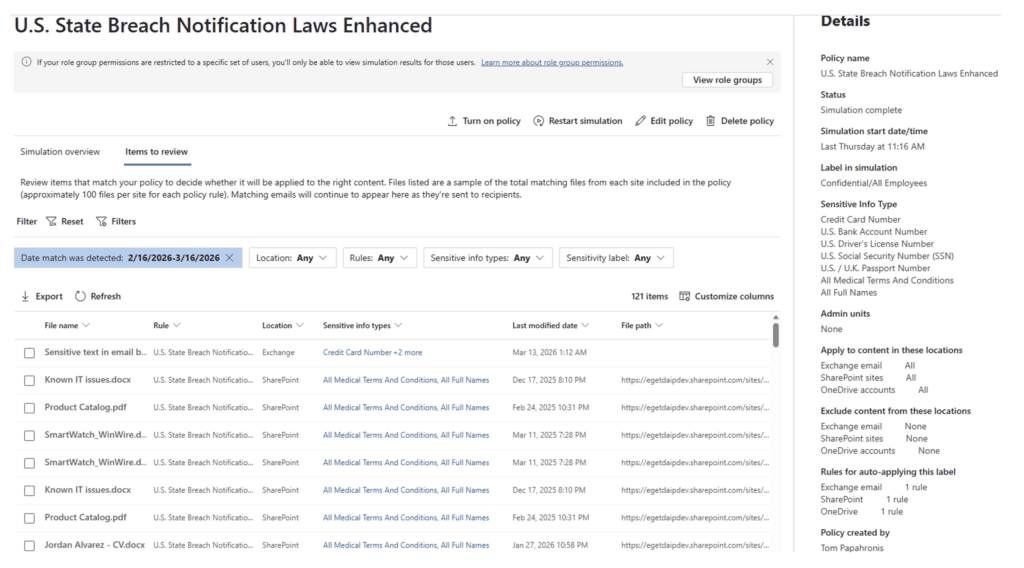
Once the simulation has been running for at least a few days, you can start to review the data that the policy would have labeled under Items to Review. Reviewing the results allows you to answer practical questions:
- Are we seeing content we expected to be labeled?
- Are there libraries or files that we expected to see that were missed by the policy?
- Are there obvious false positives?
- Are certain sites or libraries lighting up unexpectedly?
- Are multiple classifiers overlapping in ways you didn’t anticipate?
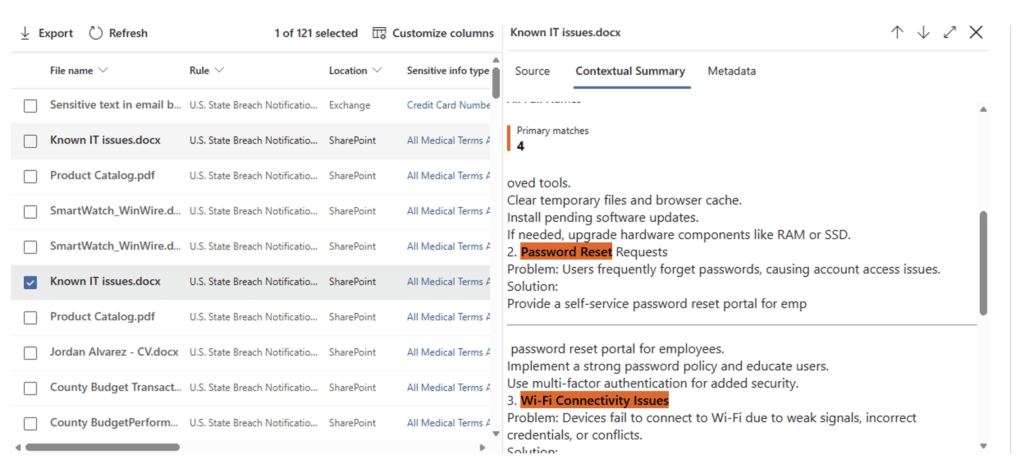
You can also review individual items so you can understand what was detected that would have triggered the label application. This information will be valuable to tune your policy and classifiers in the next step.
Note: The Simulation will run for a maximum of 30 days, so be sure to set aside time to do a structured and timely review of the results.
4. Use Simulation Feedback to Tune the Policy Before Enforcement
Simulation results should drive policy and SIT refinement. If data is misclassified (or should have been classified but wasn’t), that indicates that the policy or your SITs need some work. Also, sometimes the simulation will show sensitive data that you didn’t know about that needs to be secured. Common adjustments include:
- Modifying SIT confidence thresholds
- Tightening keyword proximity or patterns
- Scoping policies to more specific sites or libraries
- Excluding known edge cases or legacy content
The result of this is often a balancing act between maximum accuracy and making sure the automation produces a predictable outcome. This mirrors how you may be using DLP simulations already, iterating in simulation until the results align with data protection policies.


5. You Still Need to Train Employees
Even if you build perfect auto labeling policies, the most you get out of that process is well-labeled data. Don’t lose sight of the fact that the user community still needs to be aware of labels, their impacts, and how to share labeled data properly and securely. There will be instances where data labeled for internal use only will need to be shared or labels need to be modified to adjust to business changes like new regulations or a merger.
Building data governance literacy for employees will help them make good data decisions and understand how to integrate new labeling controls into their day-to-day processes so they can manage data by the rule and by the occasional exception.
From Simulation to Confident Automation
Auto-labeling simulation gives you a practical way to move from theory to reality without taking on unnecessary risk. Instead of guessing how policies will behave, you can validate them against real data, identify gaps, and make adjustments before anything is enforced.
The end goal isn’t just to automate labeling. It’s to do it in a way that is accurate, predictable, and aligned with how your business actually works.
Simulation helps you get there faster, with fewer surprises along the way.


Validate Purview Policies With Confidence
Planning sensitivity label automation in Microsoft Purview? eGroup helps organizations test, tune, and deploy information protection policies with less disruption and better accuracy.