Azure Site Recovery Deployment

Once you have reviewed the costs of Azure Site Recovery (ASR), ensured it will meet your necessary requirements, and properly planned out your deployment using the ASR Planning Tool as well as all other environmental components including storage accounts, recovery service vaults, and networking, you are now ready to being your deployment of ASR. The setup process is slightly different for Azure VMs, Hyper-V, and VMWare/Physical machines, but most tasks are identical.

Azure VMs

Azure VMs can be easily replicated to a different location within Azure all using the Azure portal.  The source location of the Azure VM cannot be the same region of the Recovery Services Vault you wish to replicate to.

To get started, go to your Recovery Services Vault to replicate a VM to and select Overview > + Replicate

From here, select Azure as the Source as well as the location and resource group of the Azure VMs.  The second step allows you to select one or more VMs to replicate.

The final step provides options on the target location.  By default, Site Recovery will mirror the source site configuration to target site by creating/using the required resource groups, storage accounts, virtual network, managed disks and availability sets, as well as replication policy. You can change the settings below by clicking on customize.  Once complete select Enable Replication and the Azure VMs are now setup for disaster recovery or can be permanently migrated to the target region.

Hyper-V

Before getting started with setting up ASR for Hyper-V, you will need to configure storage accounts, recovery services vaults, and virtual networks for where VMs will failover to.  If using Virtual Machine Manager (VMM) you will need to ensure the VMM server has at least one cloud as well as network mapping.  Also, each Hyper-V host will require Internet access.  If there is a firewall controlling access by IP address, make sure each host can connect to Azure Datacenter IP ranges via HTTPS 443.  Finally, ensure RDP access is enabled for each VM to be replicated.

To get started, go to your Recovery Vault.  Under Getting Stated select Site Recovery > Prepare Infrastructure.  This will provide a 5 step process to configure your Hyper-V hosts.  On the first step select the appropriate options (On-premises, To Azure, Yes with Hyper-V, Yes/No)

The second step confirms whether you performed proper planning.  On the 3rd step you need to add a Hyper-V site and server(s).  To add and register your host machine, download and install the Microsoft Azure Site Recovery Services agent.  This is a simple, quick installation that only requires a vault registration key, which can also be download from the portal.

Once you have your server(s) registered, proceed to the next step to select your target locations.  Here you can specify a subscription, deployment model, storage accounts, and virtual networks.  On the last step you can create and/or select a replication policy to apply to this site.  Click OK to complete the Site and Server integration to ASR.  Now we can begin selecting VMs from the register hosts to start replication.

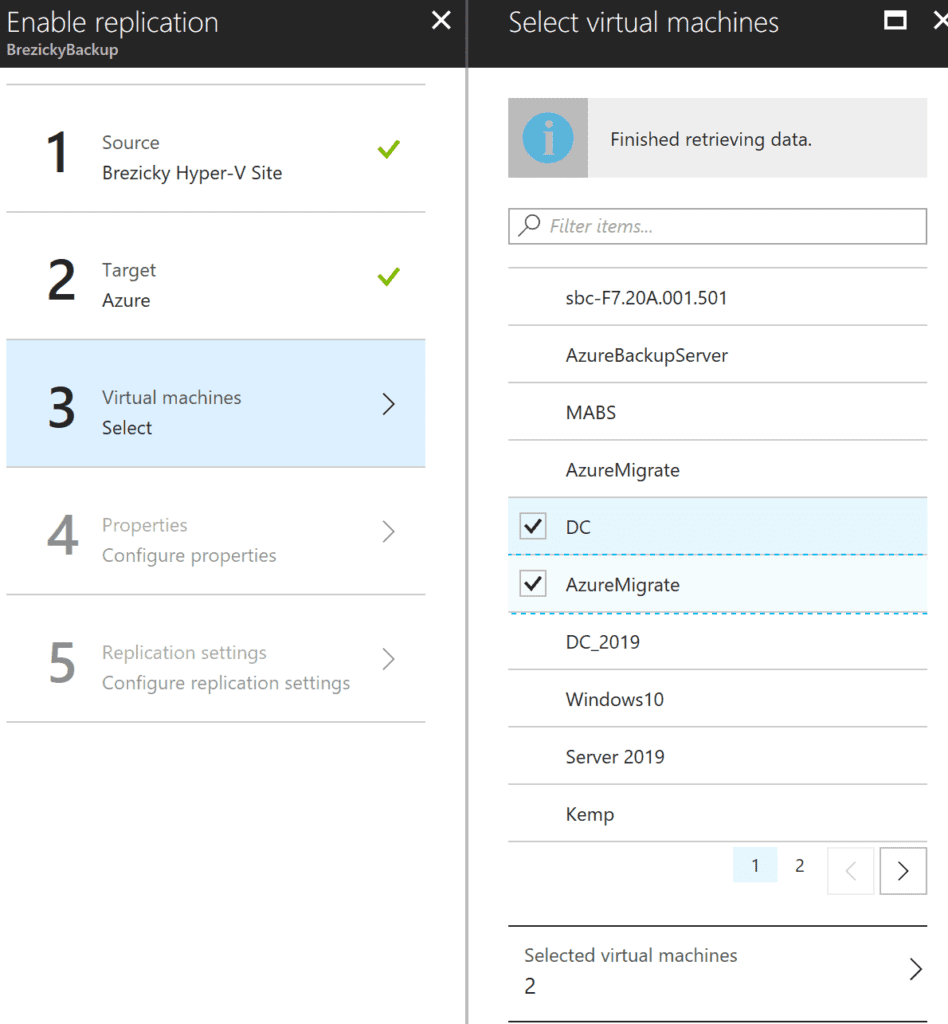
To Select VMs to replicate go to either the Overview section and select Replicate or under Getting Started > Site Recovery > Step 1: Replicate Application.  Again there is a 5 step process to configure the VMs to replicate.  First, select your source as on-premises and location as your Hyper-V site.

On the Second step, select the appropriate configuration options for the target VM.  These options include subscription, and post-failover Resource groups, deployment model, storage account, network and subnet.

The third step allows you to select one or more VMs found on the Hyper-V host to replicate.

The fourth step allows for the configuration of OS type and disks.

The fifth and final step confirms replication settings.  Once you have configured all five steps click Enable Replication to complete the setup and begin replication.  You can track progress of the Enable Protection action in Jobs > Site Recovery jobs. After the Finalize Protection job completes, the initial replication is complete, and the virtual machine is ready for failover or migration.

VMWare/Physical Machines

VMWare and Physical Machines are very similar to Hyper-V setup, except for a few items listed below:

  • Requires service account with the following access to vCenter (see chart below for permissions)

Task

Role/Permissions

VM discovery

At least a read-only user

·         Data Center object –> Propagate to Child Object, role=Read-only

Full replication, failover, failback

Create a role (Azure_Site_Recovery) with the required permissions, and then assign the role to a VMware user or group

·         Data Center object –> Propagate to Child Object, role=Azure_Site_Recovery

·         Datastore -> Allocate space, browse datastore, low-level file operations, remove file, update virtual machine files

·         Network -> Network assign

·         Resource -> Assign VM to resource pool, migrate powered off VM, migrate powered on VM

·         Tasks -> Create task, update task

·         Virtual machine -> Configuration

·         Virtual machine -> Interact -> answer question, device connection, configure CD media, configure floppy media, power off, power on, VMware tools install

·         Virtual machine -> Inventory -> Create, register, unregister

·         Virtual machine -> Provisioning -> Allow virtual machine download, allow virtual machine files upload

·         Virtual machine -> Snapshots -> Remove snapshots

  • Another account is also required permission to install ASR Mobility Service software on each VM to be replicated.
    • For Linux VMs, create a root account on the Linux servers
  • Requires configuration server (OVA template provided by Microsoft)
    • VMWare uses the service accounts created above
    • Physical machines require this to be setup manually on another server

And that is it.  You are now fully protected in the event of an outage or disaster with a small window of recovery.  No additional hardware, co-facilities, or other traditional expenses that typically came with setting up disaster recovery at a secondary, offsite location.  You can relax knowing Microsoft has your back when it comes to survivability and recovery.  Just don’t get too comfortable as it is still necessary that your disaster plan does work.  ASR has means to test and validate failover plans with minimal to no outages.

If you missed any of our other articles from the Azure Site Recovery series, you can click on the links below:

ASR Overview and Pricing

ASR Features

ASR Planning and Capacity


Contact eGroup | Enabling Technologies at info@eGroup-us.com to allow us to see how we can assist with your BCDR or Azure migration goals.  You can also check out our other Azure offerings at our Azure page on our website.

Last updated on July 27th, 2023 at 01:36 pm