How to Create Data Loss Prevention Custom SITs
Data loss prevention (DLP) is a strategy for making sure that end users do not send sensitive or critical information outside the corporate network, accidentally or intentionally. Adoption of DLP is being driven by insider threats and by more rigorous state privacy laws, many of which have stringent data protection or access components.
XML Files and Rules
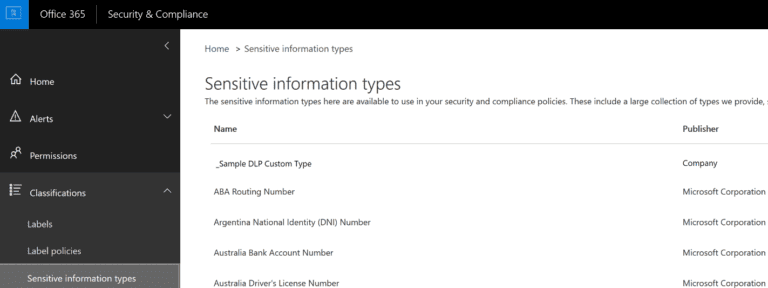
In Office 365, DLP policies includes many sensitive information types that are ready for you to use in your DLP policies that can help identify and protect credit card numbers, country specific identification numbers, and more. A full list can be found here.
As good as the default list of sensitive information types are, there are always scenarios with unique identifiers within an organization. If you need to identify and protect a different type of sensitive information (i.e. an employee ID) you can create a custom sensitive information type. A sensitive information type is defined in an XML file called a rule package. Below is a sample XML file with tips for each section.
The first section of the XML file identifies the Default language and location as well as details regarding this package, including Publisher, Name, and Description. You also need to generate new GUIDs via PowerShell with [guid]::NewGuid()
<?xml version=”1.0″ encoding=”utf-16″?>
<RulePackage xmlns=”http://schemas.microsoft.com/office/2011/mce“>
<RulePack id=”37384bc9-8f12-48d2-908f-3b0aa0a34a37″>
<Version major=”1″ minor=”3″ build=”0″ revision=”0″/>
<Publisher id=”51756121-bd43-4e5f-b869-fc10233010de”/>
<Details defaultLangCode=”en-us”>
<LocalizedDetails langcode=”en-us”>
<PublisherName>Company</PublisherName>
<Name>_Sample DLP Custom Type</Name>
<Description>Description </Description>
</LocalizedDetails>
</Details>
</RulePack>
The next section defines the rules. Within the rules section you define an Entity and Pattern that match up with either a RegEx or Keyword parameter.

When creating an entity, you can specify attributes such as patternsProximity, which is distance in Unicode characters for all other matches, as well as confidence levels between 1 and 100. Each Entity needs its own unique GUID which again can be generated via PowerShell. Within each entity you can declare different patterns, each with their own confidence level. These patterns can contain the IdMatch attribute that ties it to the variable defined in the next section as well as Min/Max counts. Also, Patterns can use predefined variables, such as Data. Additional built-in functions can be found here.
<Rules>
<Entity id=”d2ce5fe8-8509-4a5e-86d9-139be7494bec” patternsProximity=”300″ recommendedConfidence=”75″>
<Pattern confidenceLevel=”70″>
<IdMatch idRef=”employee_number“/>
</Pattern>
<Pattern confidenceLevel=”80″>
<IdMatch idRef=”employee_number“/>
<Match idRef=”Func_us_date“/>
</Pattern>
<Pattern confidenceLevel=”90″>
<IdMatch idRef=”employee_number“/>
<Match idRef=”Func_us_date“/>
<Any minMatches=”1″>
<Match idRef=”card“/>
<Match idRef=”employee”/>
</Any>
</Pattern>
</Entity>
The next section within the rules defines the actual regex and keyword parameters used in the Patterns above. You can use standard Regex expressions. Keywords or variables can be just about anything you wish. You just need to define them and include them in an Entity. MatchStype with word matches the entire text while string can be selective of many words.
<Regex id=”employee_number“>(\s)(\d{10})(\s)</Regex>
<Keyword id=”employee”>
<Group matchStyle=”word”>
<Term>Employee Number</Term>
<Term>Project X</Term>
</Group>
</Keyword>
<Keyword id=”card“>
<Group matchStyle=”string”>
<Term>card number</Term>
<Term caseSensitive=”true”>ID</Term>
</Group>
</Keyword>
The final section defines the specific language, Name, and Description for each entity called upon by the matching GUID from above. This also has the final closing tags for the Rules and RulesPackage to end the XML file.
<LocalizedStrings>
<Resource idRef=”d2ce5fe8-8509-4a5e-86d9-139be7494bec”>
<Name default=”true” langcode=”en-us”>
Employee Badge Number
</Name>
<Description default=”true” langcode=”en-us”>
Employee Badge Number
</Description>
</Resource>
</LocalizedStrings>
</Rules>
</RulePackage>
After you’ve created an XML file, you can upload it to Office 365 by using PowerShell. Then you’re ready to use your custom sensitive information type in your DLP policies and test that it’s detecting the sensitive information as you intended.
#Connect to Security and Compliance Center PowerShell
$UserCredential = Get-Credential
$Session = New-PSSession –ConfigurationName Microsoft.Exchange –ConnectionUri https://ps.compliance.protection.outlook.com/powershell-liveid/ -Credential $UserCredential -Authentication Basic –AllowRedirection
Import-PSSession $Session
#Upload New Sensitive Information Type package
New-DlpSensitiveInformationTypeRulePackage –FileData (Get-Content -Path “C:\CustomSensitiveType.xml” -Encoding Byte)
#Remove a custom sensitive information type package
Remove-DlpSensitiveInformationTypeRulePackage “NameOfYourRulePack”
You can also modify a custom sensitive information type package. This requires you to upload a new or modified XML file. You’ll need to make sure that no DLP policies or Exchange transport rules still reference the sensitive information type before removing it. Once you have your final package uploaded you can then assign it to any DLP policy or create a new one.
Contact our team of Cloud Computing Consultants who have decades of experience and can help you avoid the “minefields” to prevent missteps.

Senior Cloud Solutions Architect - eGroup | Enabling Technologies
