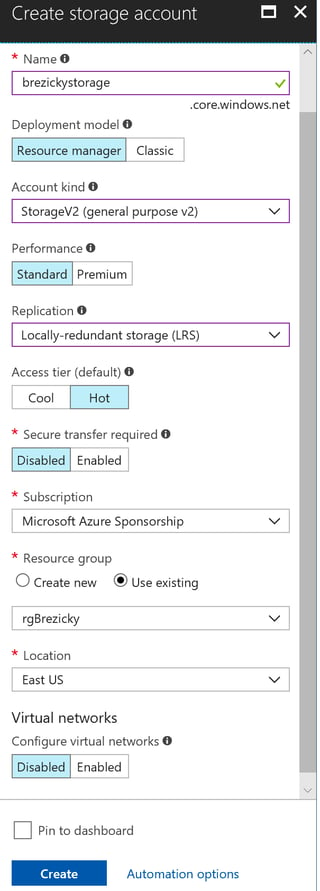
To begin using Azure Storage, you must create a storage account. Storage Accounts are used to provide access and organization to data. Each storage account can be configured with a specific set of settings that applies to all data within the storage account. Each Azure subscription can have up to 200 storage accounts, each with up to 500 TiB (roughly 550 TB) of space. There are no limits to the number of blobs or files that you can put in a storage account.
There are two different types of storage accounts: General Purpose (v1 or v2) and blob storage. General purpose accounts support blobs, files, queues, and tables. General Purpose v2 accounts have Premium (SSD) or Standard (HDD) tier performance. Standard tier can contain Blobs, Files, Tables, Queues, and Azure virtual machine disks. Premium tier is only used for Azure Virtual Machines disks. Blob storage accounts are specific for unstructured data and only support block blobs and append blobs. Most scenarios call for the use of General Purpose v2 storage account type.
With General Purpose v2 and Blob storage accounts, you can select an Access tier. There are three tiers available.
- Hot: This is for objects stored that are frequently accessed. Transaction costs are lower, but data storage costs are higher.
- Cool: This is for objects that are infrequently accessed. Transaction costs are higher, but data storage costs are lower.
- Archive: This is for archival objects meant for long term storage such as yearly backups or data that must be kept indefinitely. This tier has the lowest storage cost, but the highest transaction costs. In addition, this tier can only be set at the blob level (per object). Archive data cannot be accessed. You are required to convert it back to hot or cool tier storage and requires up to a 15-hour rehydration period. This tier can only be applied to individual blobs, not an entire container or account.
The following shows an example of creating an Azure storage account:
Microsoft Azure Blob Storage
Blob storage is for storing blobs. A blob is a file of any type and size. Blobs are stored in containers. A container is a way to group blobs together. All blobs must be in a container. You can have as many containers as needed and each container can hold as many blobs as needed. There are three types of blobs:
- Block blobs – Ideal for documents or media files. These files can be up to 4.75TB
- Page blobs – Ideal for frequent read/write operations. Azure uses page blogs for storing objects such as VM OS and data disks as well as Backup and Site Recovery operations. These can be up to 8TB.
- Append blobs – Ideal for append operations, such as logging scenarios. These can be up to 195GB.
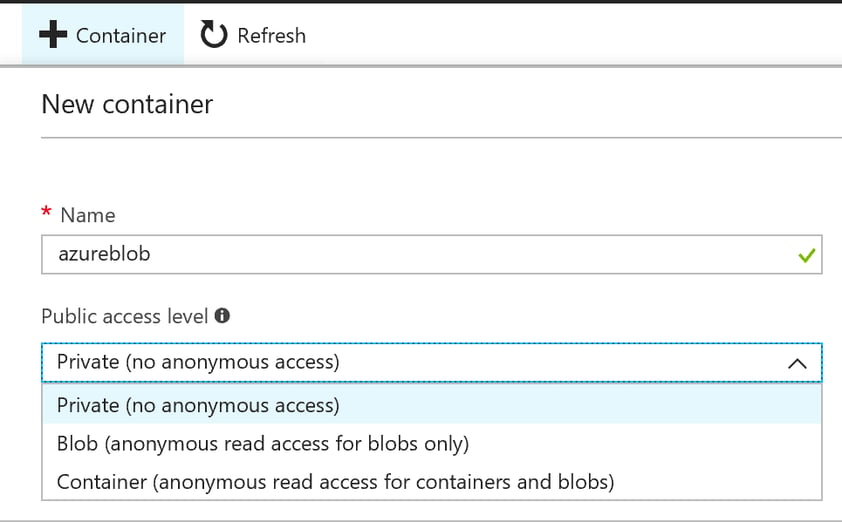
To get started with Blob storage, go to your Azure storage account and select Blob Storage > Containers. Create a container and specify the access level.
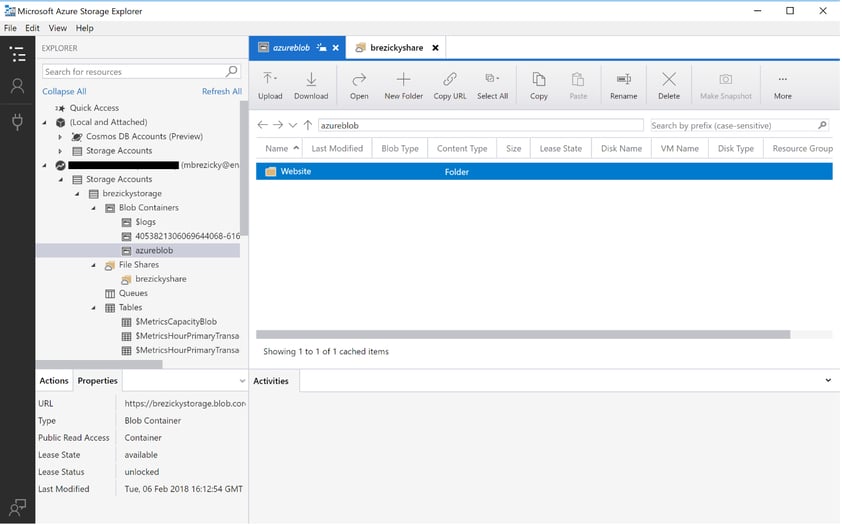
Once the container is created you can simply upload files directly from the Azure web portal. During the upload you can specify the blob type, block size, as well as a folder. If the folder does not exist, it will be created. Once uploaded you can access your file depending on the Public Access level. Blobs typically get a URL if the format https://<StorageAccount>/<Container>/<Folder>/<Blob>. For example, the file uploaded in the example below can be accessed at “https://brezickystorage.blob.core.windows.net/azureblob/Website/bookmark.htm”.
Azure Files and File Shares
You can use Azure Files to create File Shares in the cloud without all the hassle of maintaining an on-premises server or constantly replacing bad disks in an appliance. Azure files use Server Message Block (SMB) protocol and can be mounted on any Windows, Linux, or macOS machine. Azure Files can have a maximum of 5TB in size, with maximum 1TB individual file size, but unlimited number of files.
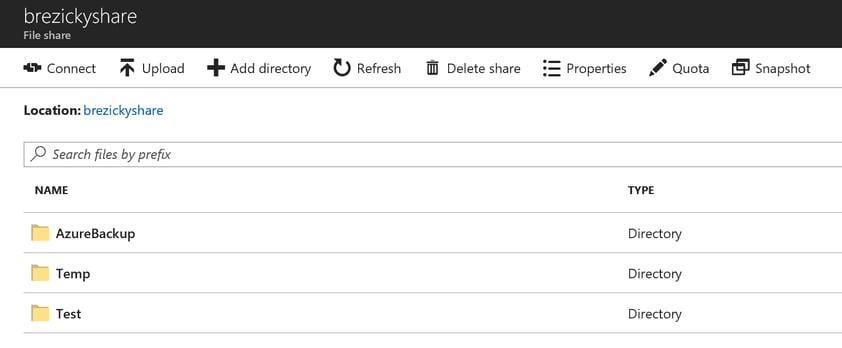
To get started go to your storage account and select File Service > Files and click File Share. Provide a name and quota. The name must be all lowercase.
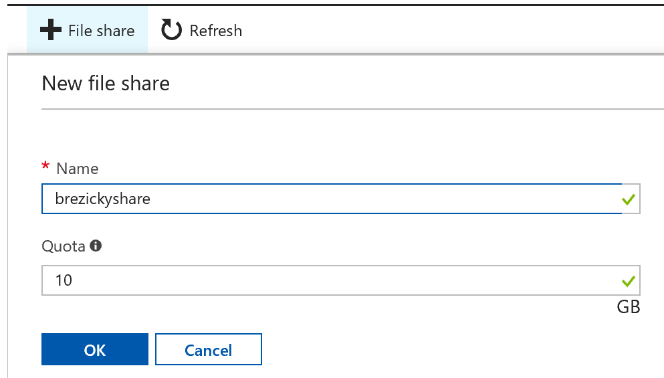
Once created you can upload files, create directories, or click connect to obtain information to mount to Windows or Linux. Note that you cannot assign folder level permissions, unless accessing with Shared Access Signature.
Viewing and accessing data
Once you have data stored in Azure storage there are several ways of viewing and accessing your data. You need to have your storage account name and Access Key or a Shared Access Signature (SAS) to access your data from anywhere except directly from the Azure Web Portal. You can obtain your access key from the Azure Web Portal within your storage account under Settings > Access Keys. These can be easily regenerated at any time. You can also generate a SAS to provide specific delegated access to your storage account for a specific period.
Azure Web Portal
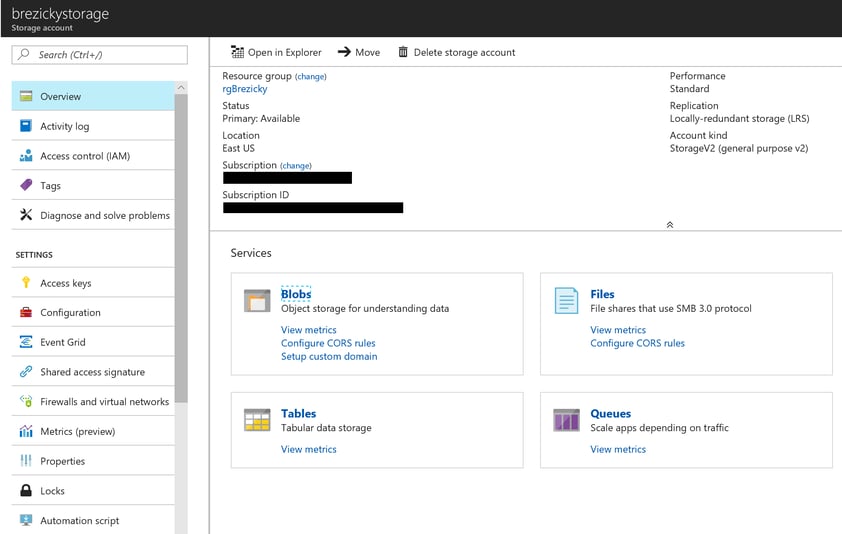
Using the Azure Web Portal, you have access to all storage options and can fully access all blobs, file shares, tables, and queues to manage and maintain. The Azure Web Portal also provides many other options to configure including diagnostics, metrics, and other configurations and properties regarding your storage account.
Azure Storage Explorer
(Download)
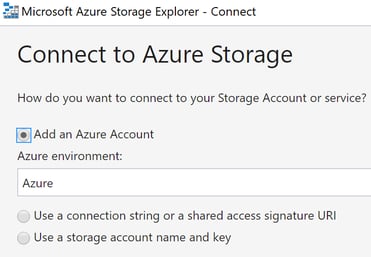
Azure Storage Explorer is a standalone application that can be installed on Windows, macOS, and Linux to provide a graphical way to access your storage account. Storage Explorer can be used to access and manage blobs, files, queues, and tables. You can connect to a storage account in several different ways including Microsoft Entra ID (formerly known as Azure AD) Authentication, SAS, or Access Key. Once connected you can see all the data you have access to based on the connection method.
AzCopy
(Download)
AzCopy is a command line utility that can be used to upload and download from Blobs and File Share storage using simple commands. Wildcards and other parameters can be used to upload/download several files at once. You can also copy files from one container to another. You can upload/download directly to file shares as well with AzCopy.
The syntax to download a blob looks like this:
AzCopy /Source: https://brezickystorage.blob.core.windows.net/azureblob/ Dest:C:\temp /SourceKey: NRZgSGp8/oImm7ZWlSVeu5jNXIrGA+w3CGdBlGUqF2lWhq8uOn2NNOky9/Aawyuu0TQZ/+Hjv5gN6c+g/WuDYQ== /Pattern:”Website/bookmark.htm”To upload files to a blob the syntax is very similar:AzCopy /Source:C:\temp /Dest:https://brezickystorage.blob.core.windows.net/azureblob/Website /DestKey: NRZgSGp8/oImm7ZWlSVeu5jNXIrGA+w3CGdBlGUqF2lWhq8uOn2NNOky9/Aawyuu0TQZ/+Hjv5gN6c+g/WuDYQ== /Pattern:” bookmark.htm”
File Shares
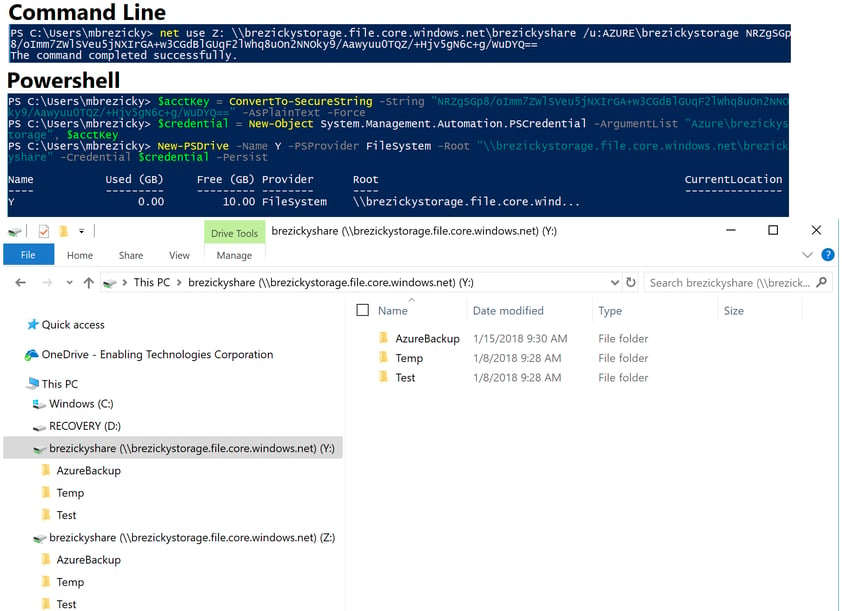
Azure File Shares can be directly mounted onto a Windows Machine using either command line (net use) or PowerShell (New-PsDrive). You need the Azure File Share path, Storage Account name, and the Access key. Examples of each are below. Once the commands are run they are available like any other mounted file share. These commands can be easily inserted into existing processes to ensure users maintain access to their data. You can obtain these commands from the file share within the Azure Web Portal and click the Connect button. File shares can also be mounted to Linux machines.
Azure Storage can be complex and confusing at times. The best way to understand it is to start small. Simply get started with creating some basic blobs and file shares then expanding from there.
eGroup | Enabling Technologies can help you properly prepare for moving to Azure Storage based on Microsoft Best Practices.

