Onboarding Data Sources Into Azure Sentinel

Knowing what data you wish to analyze within a SIEM solution provides a tremendous advantage to deploying Azure Sentinel. However, that is not always the case during an initial deployment. You don’t know what you don’t know. 

Luckily, Microsoft allows free ingestion of most Azure and Office 365 activities (note, Microsoft Entra ID (formerly Azure AD) Audit data is not free). If you are unsure of how you plan on best utilizing a SIEM solution, it is recommended to get started using the free data for a very low cost solution until you have a security operations plan and understand how Azure Sentinel will support that plan.

Getting Started

To get started with Azure Sentinel there are a few basic prerequisites:

  • Active Azure subscription
    • Contributor permissions on subscription is required to create the Azure Sentinel components
  • Log Analytics Workspace
    • Recommend creating a new, dedicated workspace for Azure Sentinel

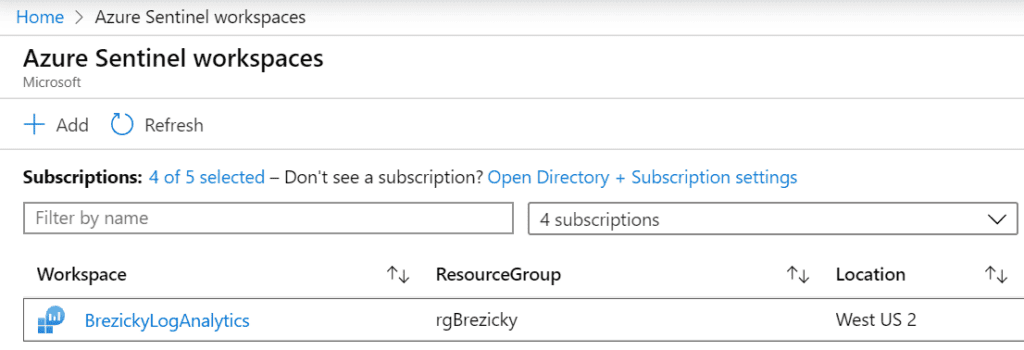
Once the prerequisites have been configured, go to the Azure Portal and search for and select Azure Sentinel. Choose your dedicated workspace (Or select Add if not already created). This will configure the workspace for Azure Sentinel (increasing free retention for 90 days, opposed to 30 days) and then take you to the Overview page. 

Ingesting Data

Once Azure Sentinel has been provisioned, your first task is to connect your data sources.  There are currently three methods to connect a variety of data sources.

  1. Service to Service
  2. APIs
  3. Syslog/Common Event Format

Service-to-Service

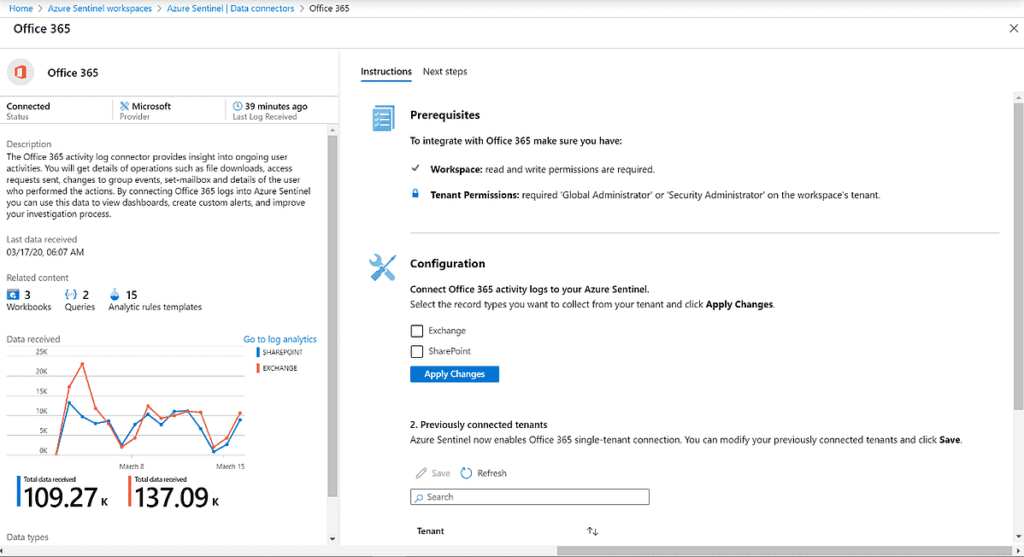
Service-to-Service connection options are fully configured with a few clicks directly in the Azure portal, as long as you have the right level of permissions.  For example, to connect Office 365 data, you need to use a Global or Security Administrator account to authenticate and add the data connector.  However, no other configuration or components are required.  Simply go to the Connector page directly in the Azure Sentinel > Data Connectors page.  There will be an option to connect to the service.  For Office 365 data connector, select Exchange and/or SharePoint and click Apply changes.  You will be able to see data flowing to Azure Sentinel within 15 minutes.  Each connector has insights to the amount of data received.

APIs

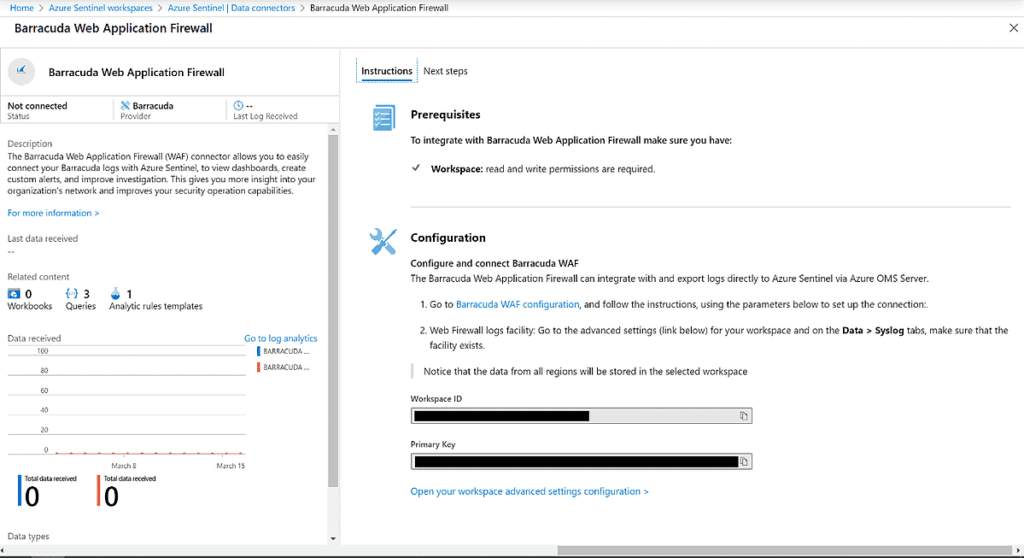
Several supported external solutions can connect via API or agent.  API connections are typically embedded into the appliance configuration and you need to share Azure Sentinel Workspace ID and Key.  For example, if you have a Barracuda Web Application Firewall, you can configure the solution to directly send to Azure Sentinel by obtaining the Workspace ID and key from Azure Sentinel and following the instructions provided by Microsoft and the vendor solution page.

Syslog/CEF

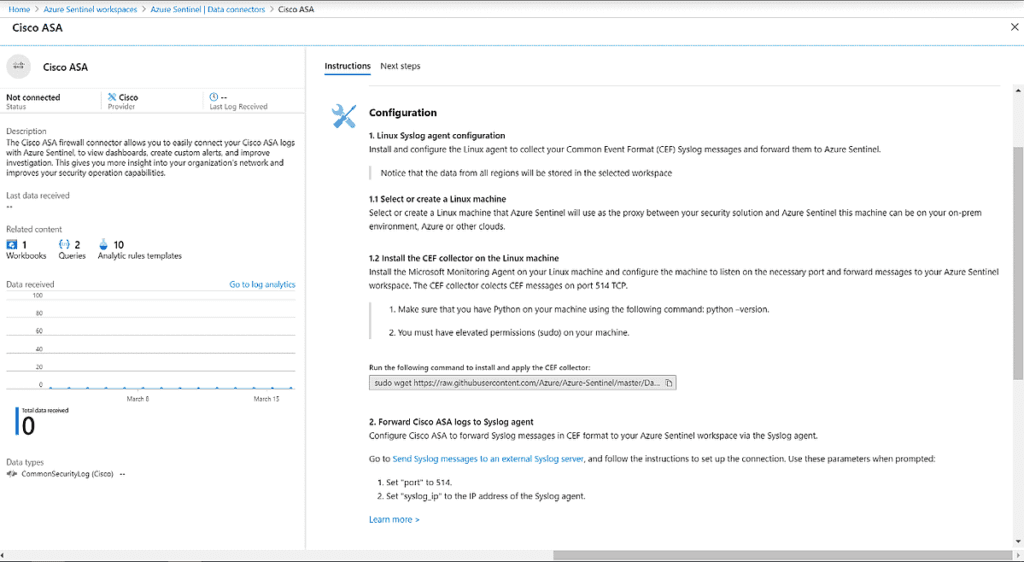
The final connection option is an agent-based Linux server to proxy syslog or Common Event Format (CEF) logs.  Most major Linux OS types are supported (See Prerequisites).  You can choose to deploy your own server in Azure or an alternative location (on-premises, other cloud, etc.).  Some data connectors allow for an automatic deployment on an Azure based Linux VM.  It is recommended to deploy the agent in the same location where the data source lives.  You can have a single agent for multiple data sources. 

Data sources can use the default port of 514.  TCP is preferred, but UDP and TLS are supported.  For TLS communication, you will need to configure the Syslog daemon (rsyslog or syslog-ng) to communicate in TLS.  If deploying the server on-premises, the agent VM also needs to communicate to Azure Sentinel via port 443.

General instructions are provided in the data connector page.  You need to install the agent collector on the Linux VM by running the following commands:

### Verify Python on your machine ###

python –version

### Run with elevated permissions ###

sudo wget https://raw.githubusercontent.com/Azure/Azure-Sentinel/master/DataConnectors/CEF/cef_installer.py&&sudo python cef_installer.py [WorkspaceID] [Workspace Primary Key]

This can be copied directly from the data collector page.  Additional instructions for each type of data connector are also provided to forward Syslog or CEF logs to the agent VM.

Summary

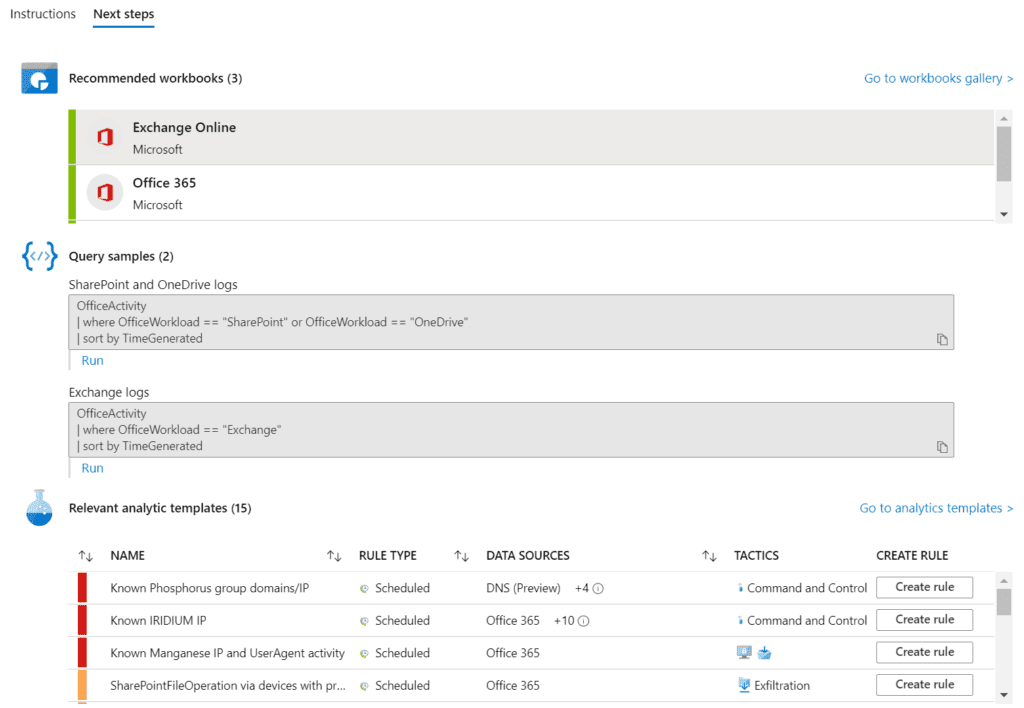
Connecting your data sources is the first step to begin utilizing Azure Sentinel.  It is recommended to immediately connect the free, built in components to easily test out Azure Sentinel, such as Office 365 data.  Once you connect a data source, you can begin creating workbooks, hunting queries, and analytic rules.  Fortunately, Microsoft has also provided most data connectors with Microsoft created templates for each of these components.  If you are not sure what specifically to hunt for, these templates provide an out of the box experience to maximize your initial efforts in deploying Azure Sentinel. 

What’s Next

eGroup | Enabling Technologies can help you properly prepare for moving to the cloud based on Microsoft Best Practices and utilizing a secure and productive environment. Work with our team of Cloud Computing Consultants who have years of experience and know all of the “minefields” to prevent missteps.

Last updated on August 3rd, 2023 at 01:44 pm